How to create a simple NEAR Protocol dApp by using Nuxt
Sergii Lysenko
December 2, 2021
In this short tutorial you will learn how easy is it to create a simple dApp on NEAR blockchain with a help of Nuxt framework and near-api-js library.
So called Web3 is expanding day after day and you don’t need to learn how different blockchains work to start creating a decentralized applications by using familiar tools and frameworks.
Please, note that you need some prerequisites before starting with this tutorial. Let’s assume that you have Node.js and some package manager (such as npm or Yarn) installed on your system. If you don’t have them, feel free to download Node.js here (I would recommend you to use LTS version to avoid some possible compatibility issues). With this installation package you will also get npm package manager on your system (it is included, so you don’t need to install it separately).
Also I assume that you have some knowledge in core technologies of web development, such as HTML, CSS and JavaScript and somehow familiar with Nuxt or Vue.js frameworks.
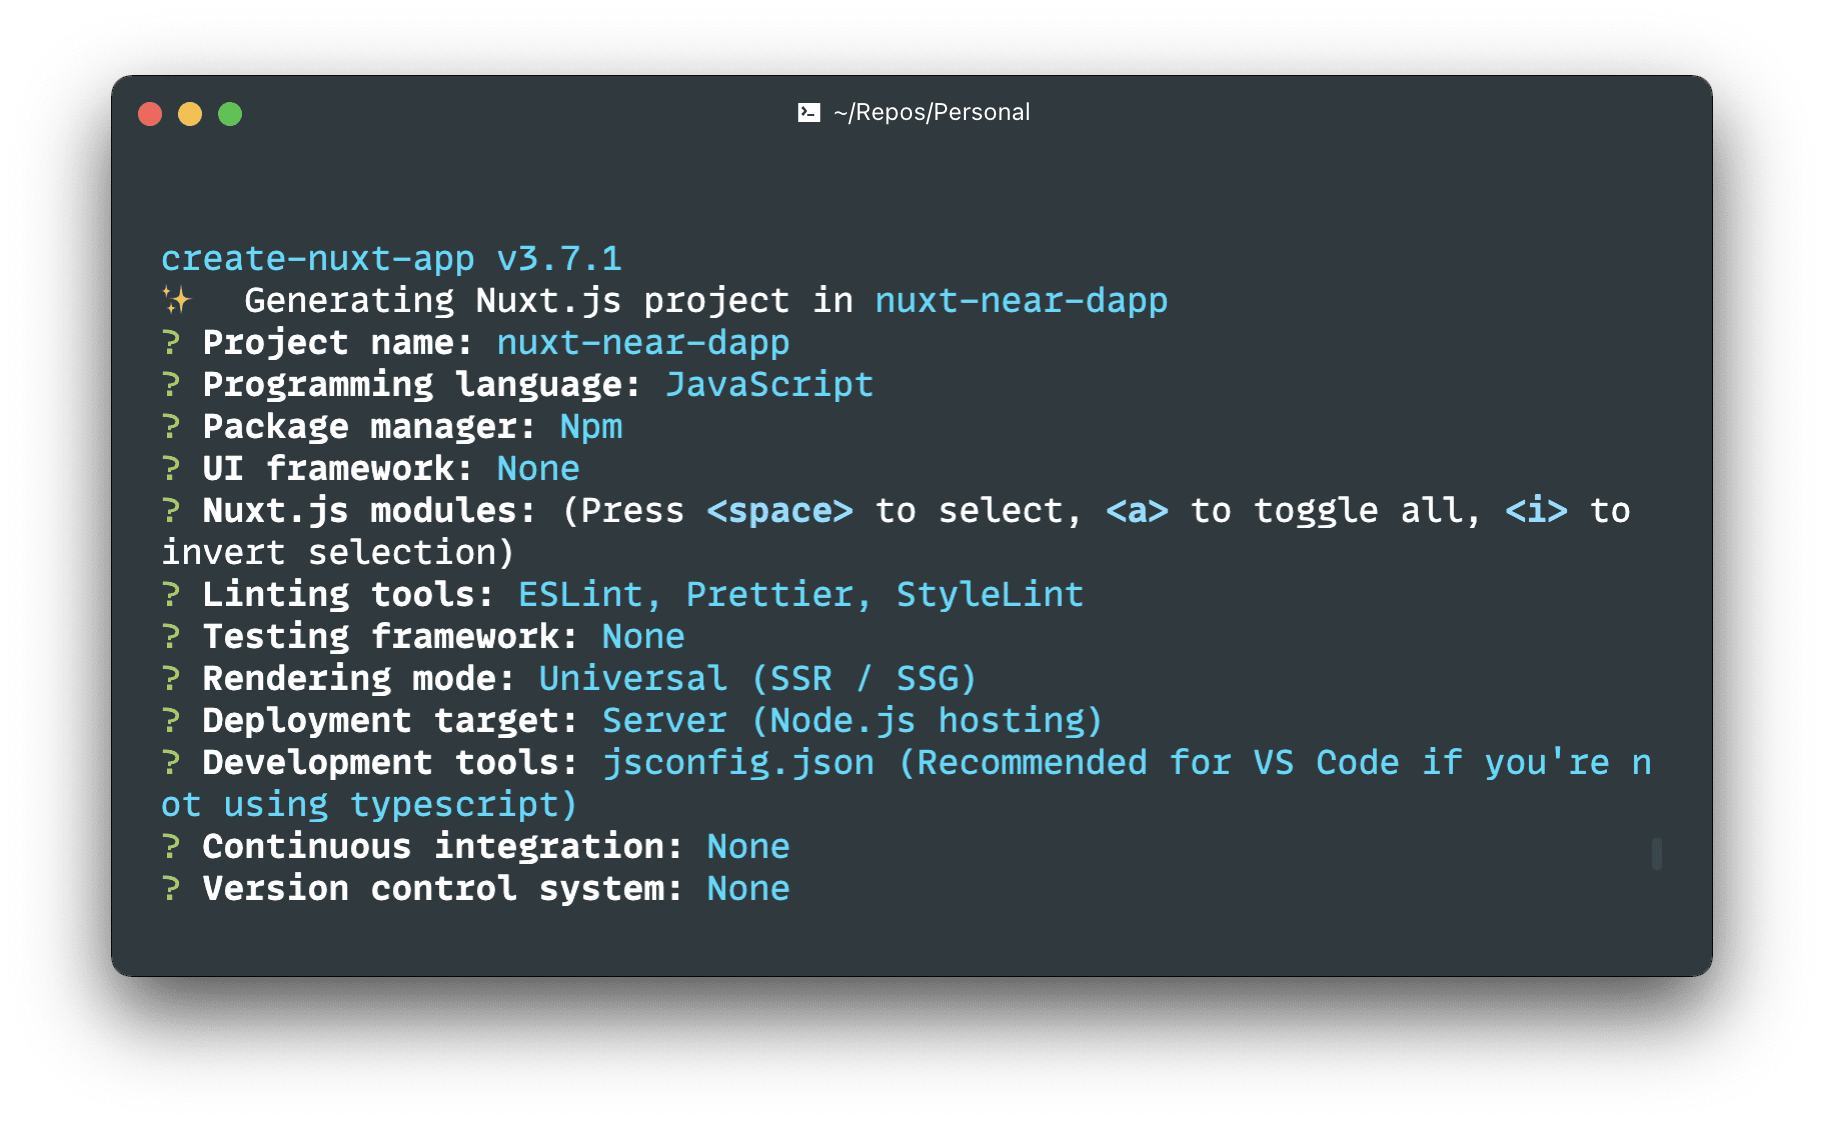
And now you are ready to start with creating a skeleton of our future dApp by using Nuxt’s official create-nuxt-app package. To do that one can simply call the following command in the terminal application (it can be Terminal.app, Hyper, iTerm or something else):
npx create-nuxt-app nuxt-near-dappwhere:
npxis a name for an npm package runnernuxt-near-dappjust a directory name for your future project, you can call it whatever you like
After that you should answer a few questions about your future project, some additional tools and libraries you may use, etc., so create-nuxt-app will be able to scaffold an ideal starter for your project.
npm will install all required packages and tools inside node_modules directory of your project. Feel free to open your project directory in your favourite text editor or IDE and navigate into your project directory via your terminal cd nuxt-near-dapp. Please note that we need to install one more library in order to connect to a NEAR blockchain and it’s native Wallet. It is called near-api-js and this is an official JavaScript/TypeScript library for development of dApps on the NEAR platform that was developed by NEAR devteam. To install it via npm just execute the next command in your terminal:
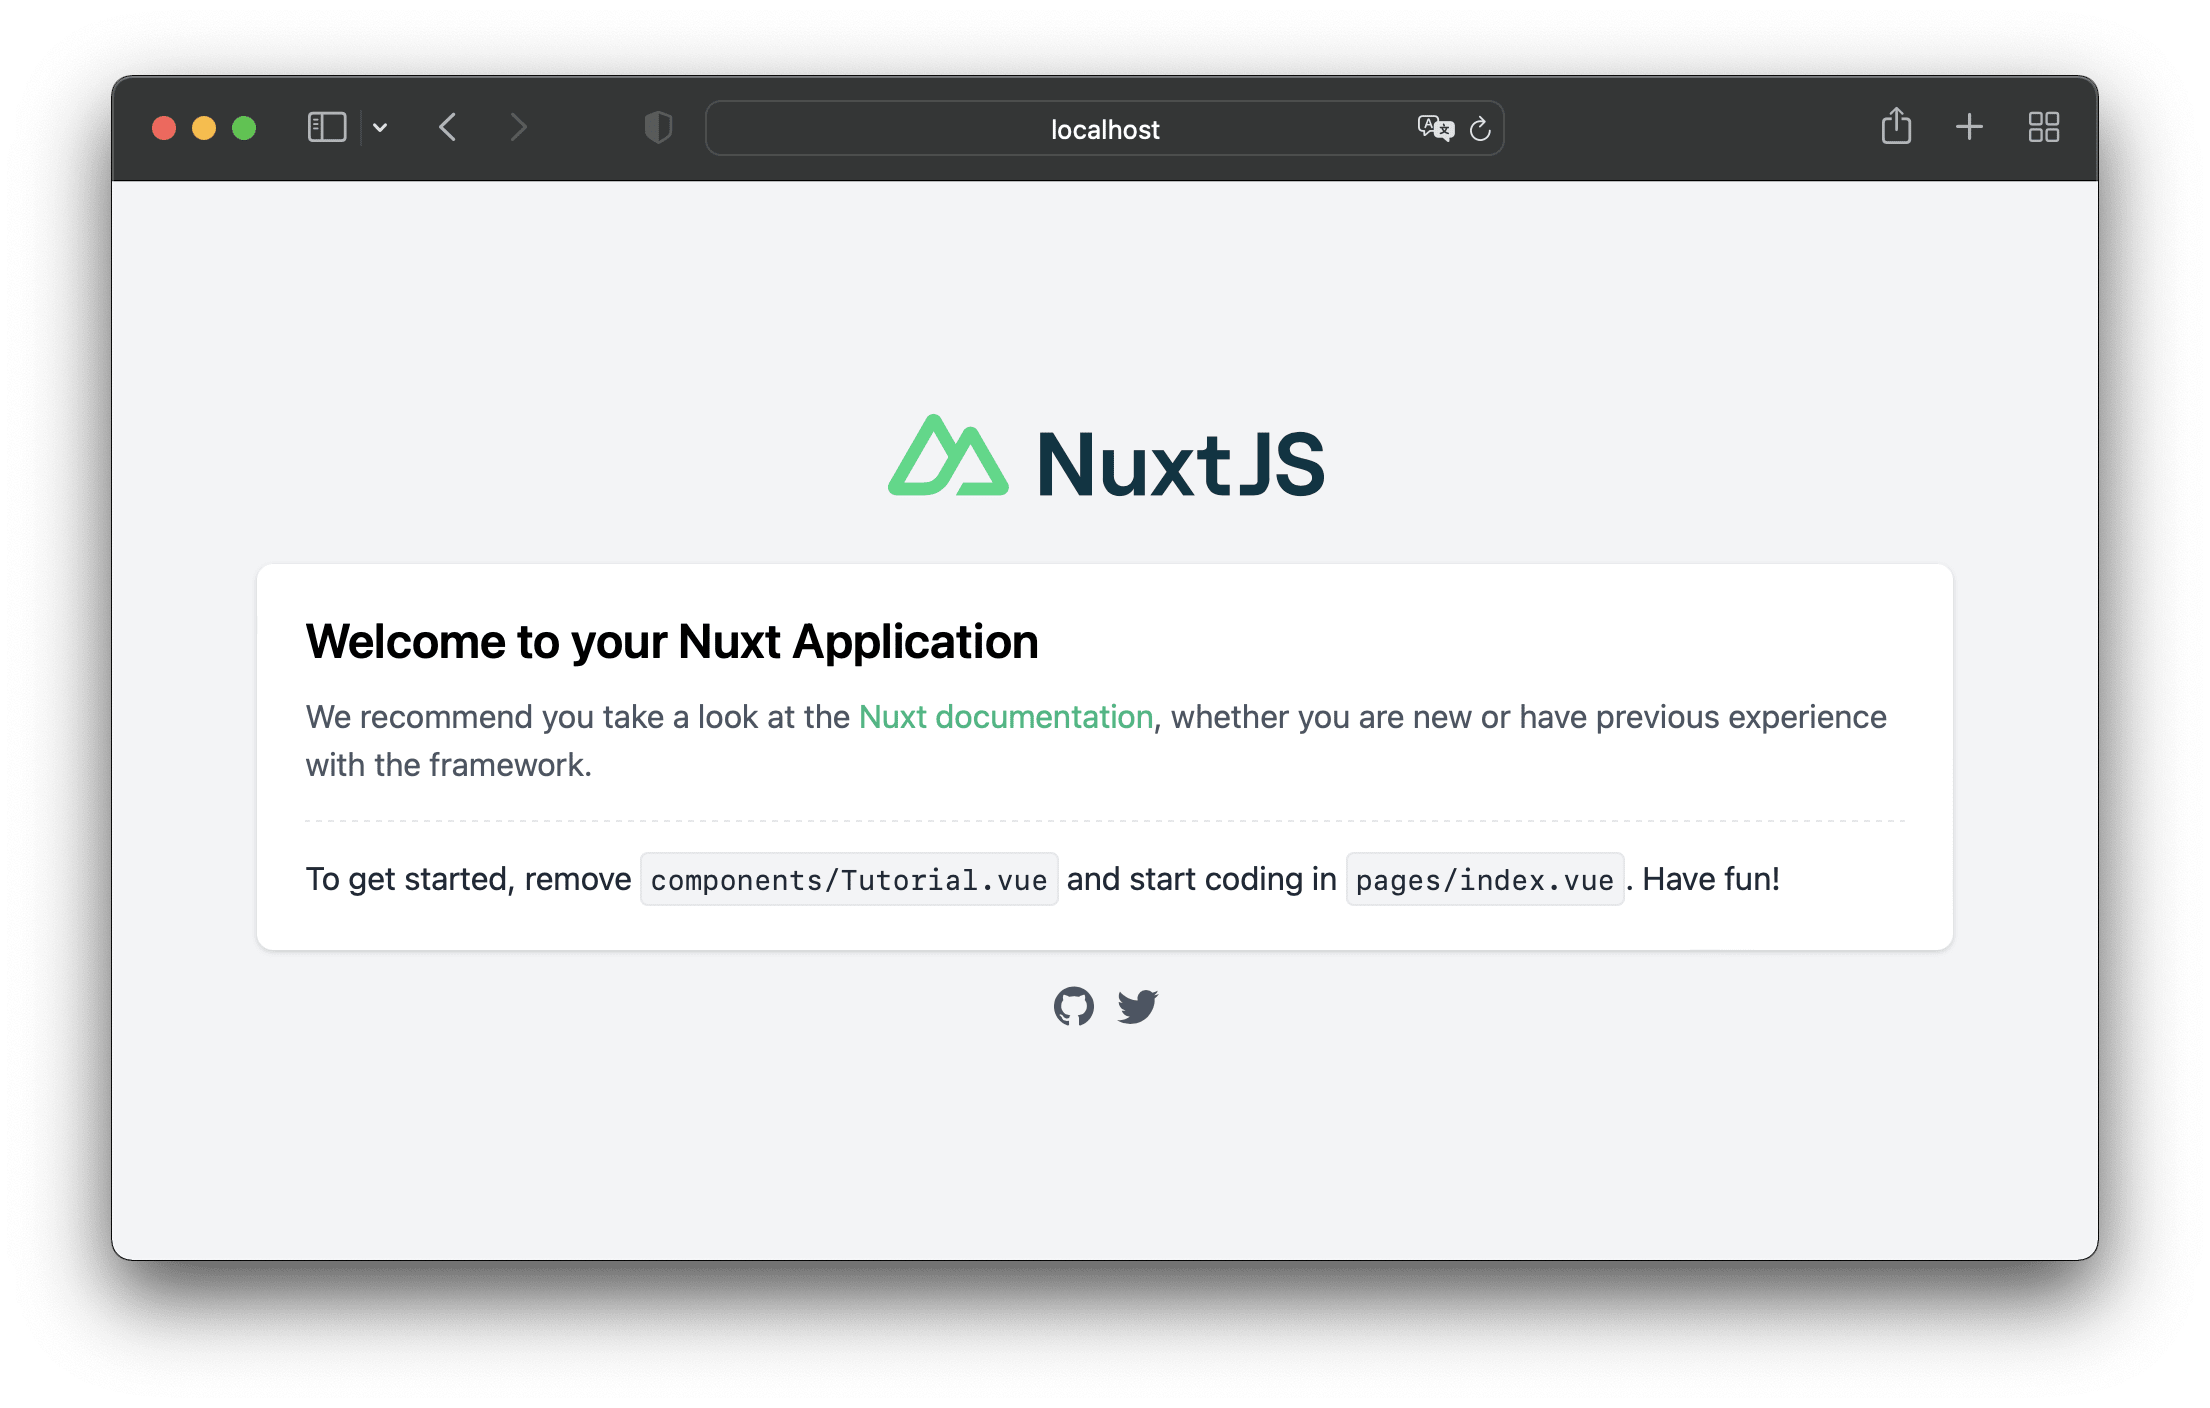
npm install -S near-api-jsAfter installing is finished the only thing you need to do is to run a command that will spin up a dev server for you npm run dev. And now you should be ready to start hacking 💻.
By default your dev server should start on localhost:3000 and your application should look like this:
It this tutorial we are going to add an ability for our visitors to connect their NEAR wallets to our dApp and check their NEAR token balances. If you don’t have a wallet already, don’t worry – you can get a Mainnet wallet here (please, note that in order to create a wallet on Mainnet you need to deposit a small amount of NEAR, at the time of writing it is equal to 0.1 NEAR) or you can use Testnet wallet which can be created for free here. To simplify this tutorial we are going to use Testnet network.
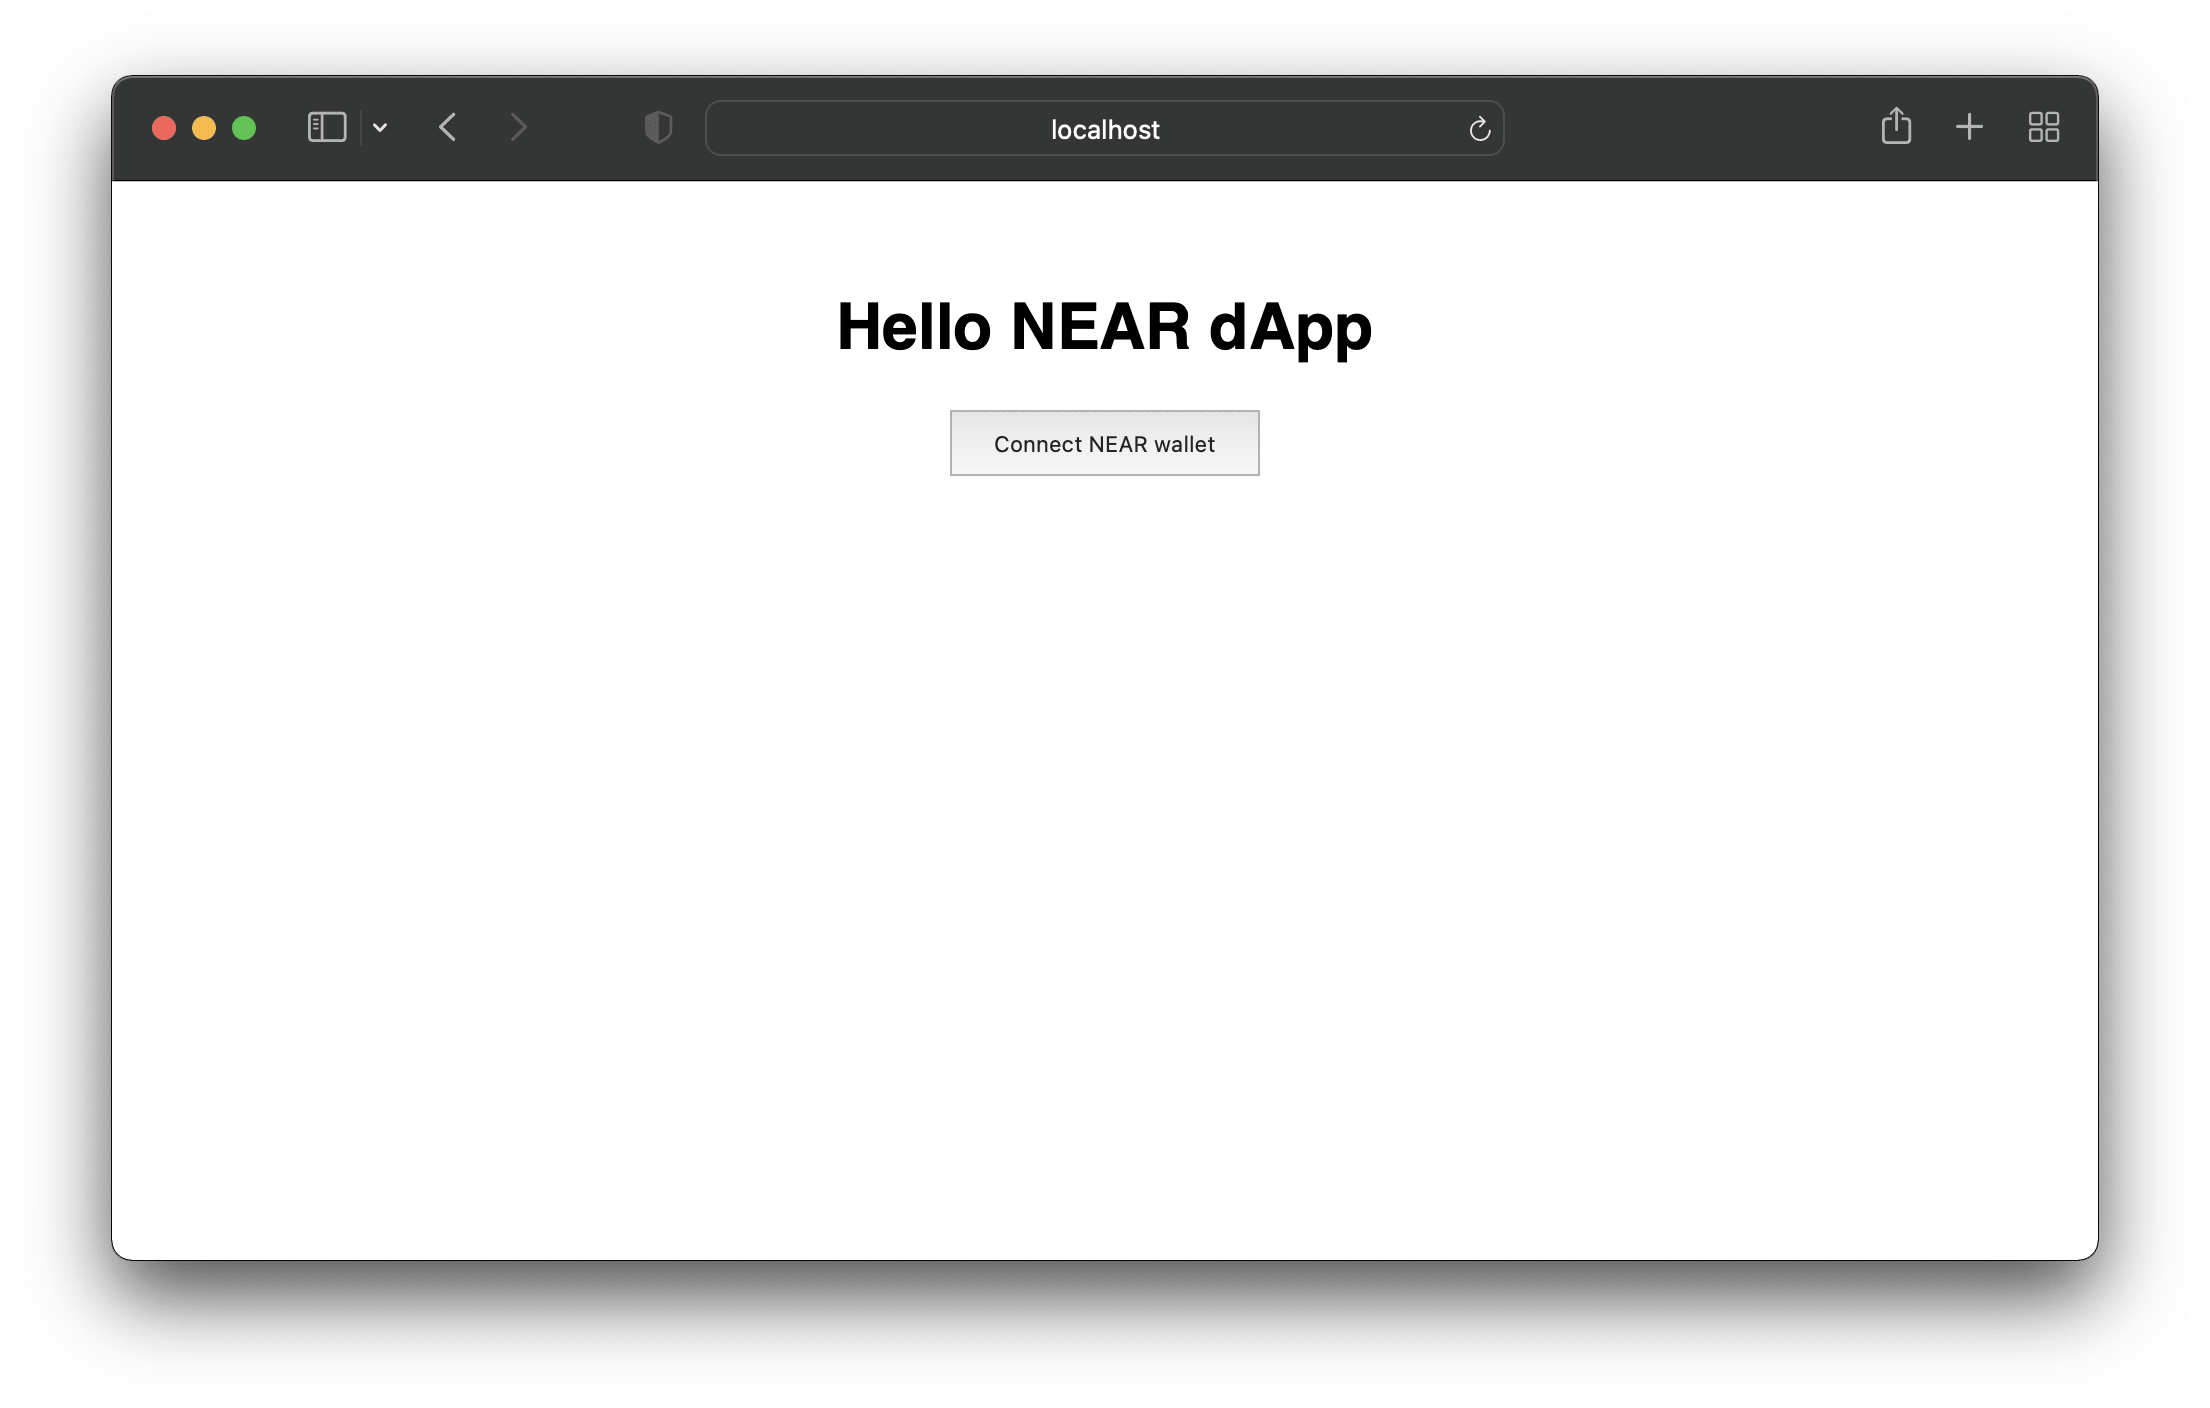
First of all, let’s get rid of all unnecessary stuff in our application because we want to keep it as simple as possible. For now we just need to open [pages/index.vue] file in your favorite code editor and replace everything inside <template> tag with the following code:
<div class="container">
  <h1 class="heading">Hello NEAR dApp</h1>
  <button type="button" class="btn">Connect NEAR wallet</button>
</div>
Save the file and check your browser. You page should looks like this:
At the moment we need to establish a connection to a NEAR network and then to a visitors NEAR wallets. To be honest it is pretty simple with a help of near-api-js library. First of all, let’s import this library inside our <script> tag:
import * as nearAPI from "near-api-js";Then we should configure this library in order to connect to NEAR. Let’s do that inside mounted method of our page component (this is a special method that will be called right after our page component is mounted into the DOM):
export default {
  data() {
    return {
      near: null,
      wallet: null,
    }
  },
  async mounted() {
    // this will store a wallet access keys in browser's local  storage
    const keyStore = new nearAPI.keyStores.BrowserLocalStorageKeyStore();
    // configuration object
    const config = {
      networkId: 'testnet',
      keyStore,
      nodeUrl: 'https://rpc.testnet.near.org',
      walletUrl: 'https://wallet.testnet.near.org',
      helperUrl: 'https://helper.testnet.near.org',
      explorerUrl: 'https://explorer.testnet.near.org',
    };
    // connect to NEAR
    this.near = await nearAPI.connect(config);
    // create wallet connection
    this.wallet = new nearAPI.WalletConnection(this.near);
  }
}
After creating a connection to NEAR wallet we can enable wallet sign in and sign out functionality right inside our application. For this we just need to use two simple methods of wallet’s API, so let’s create two additional methods for our component:
methods: {
  login() {
    // this will redirect user to a wallet to authorize your dApp
    this.wallet.requestSignIn();
  },
  logout() {
    // this will delete all wallet access keys in browser local storage
    this.wallet.signOut();
  },
}
Now let’s change our template a little bit and show slightly different UI for authorized and not-authorized users. NEAR wallet API has a special method to determine whether visitor’s wallet is connected already or not. It is called wallet.isSignedIn(). Also, it has the ability to get wallet name by calling wallet.getAccountId() method. So we can simply add additional condition inside our mounted method to get information about currently connected user/wallet:
if (this.wallet.isSignedIn()) {
this.currentUser = this.wallet.getAccountId()
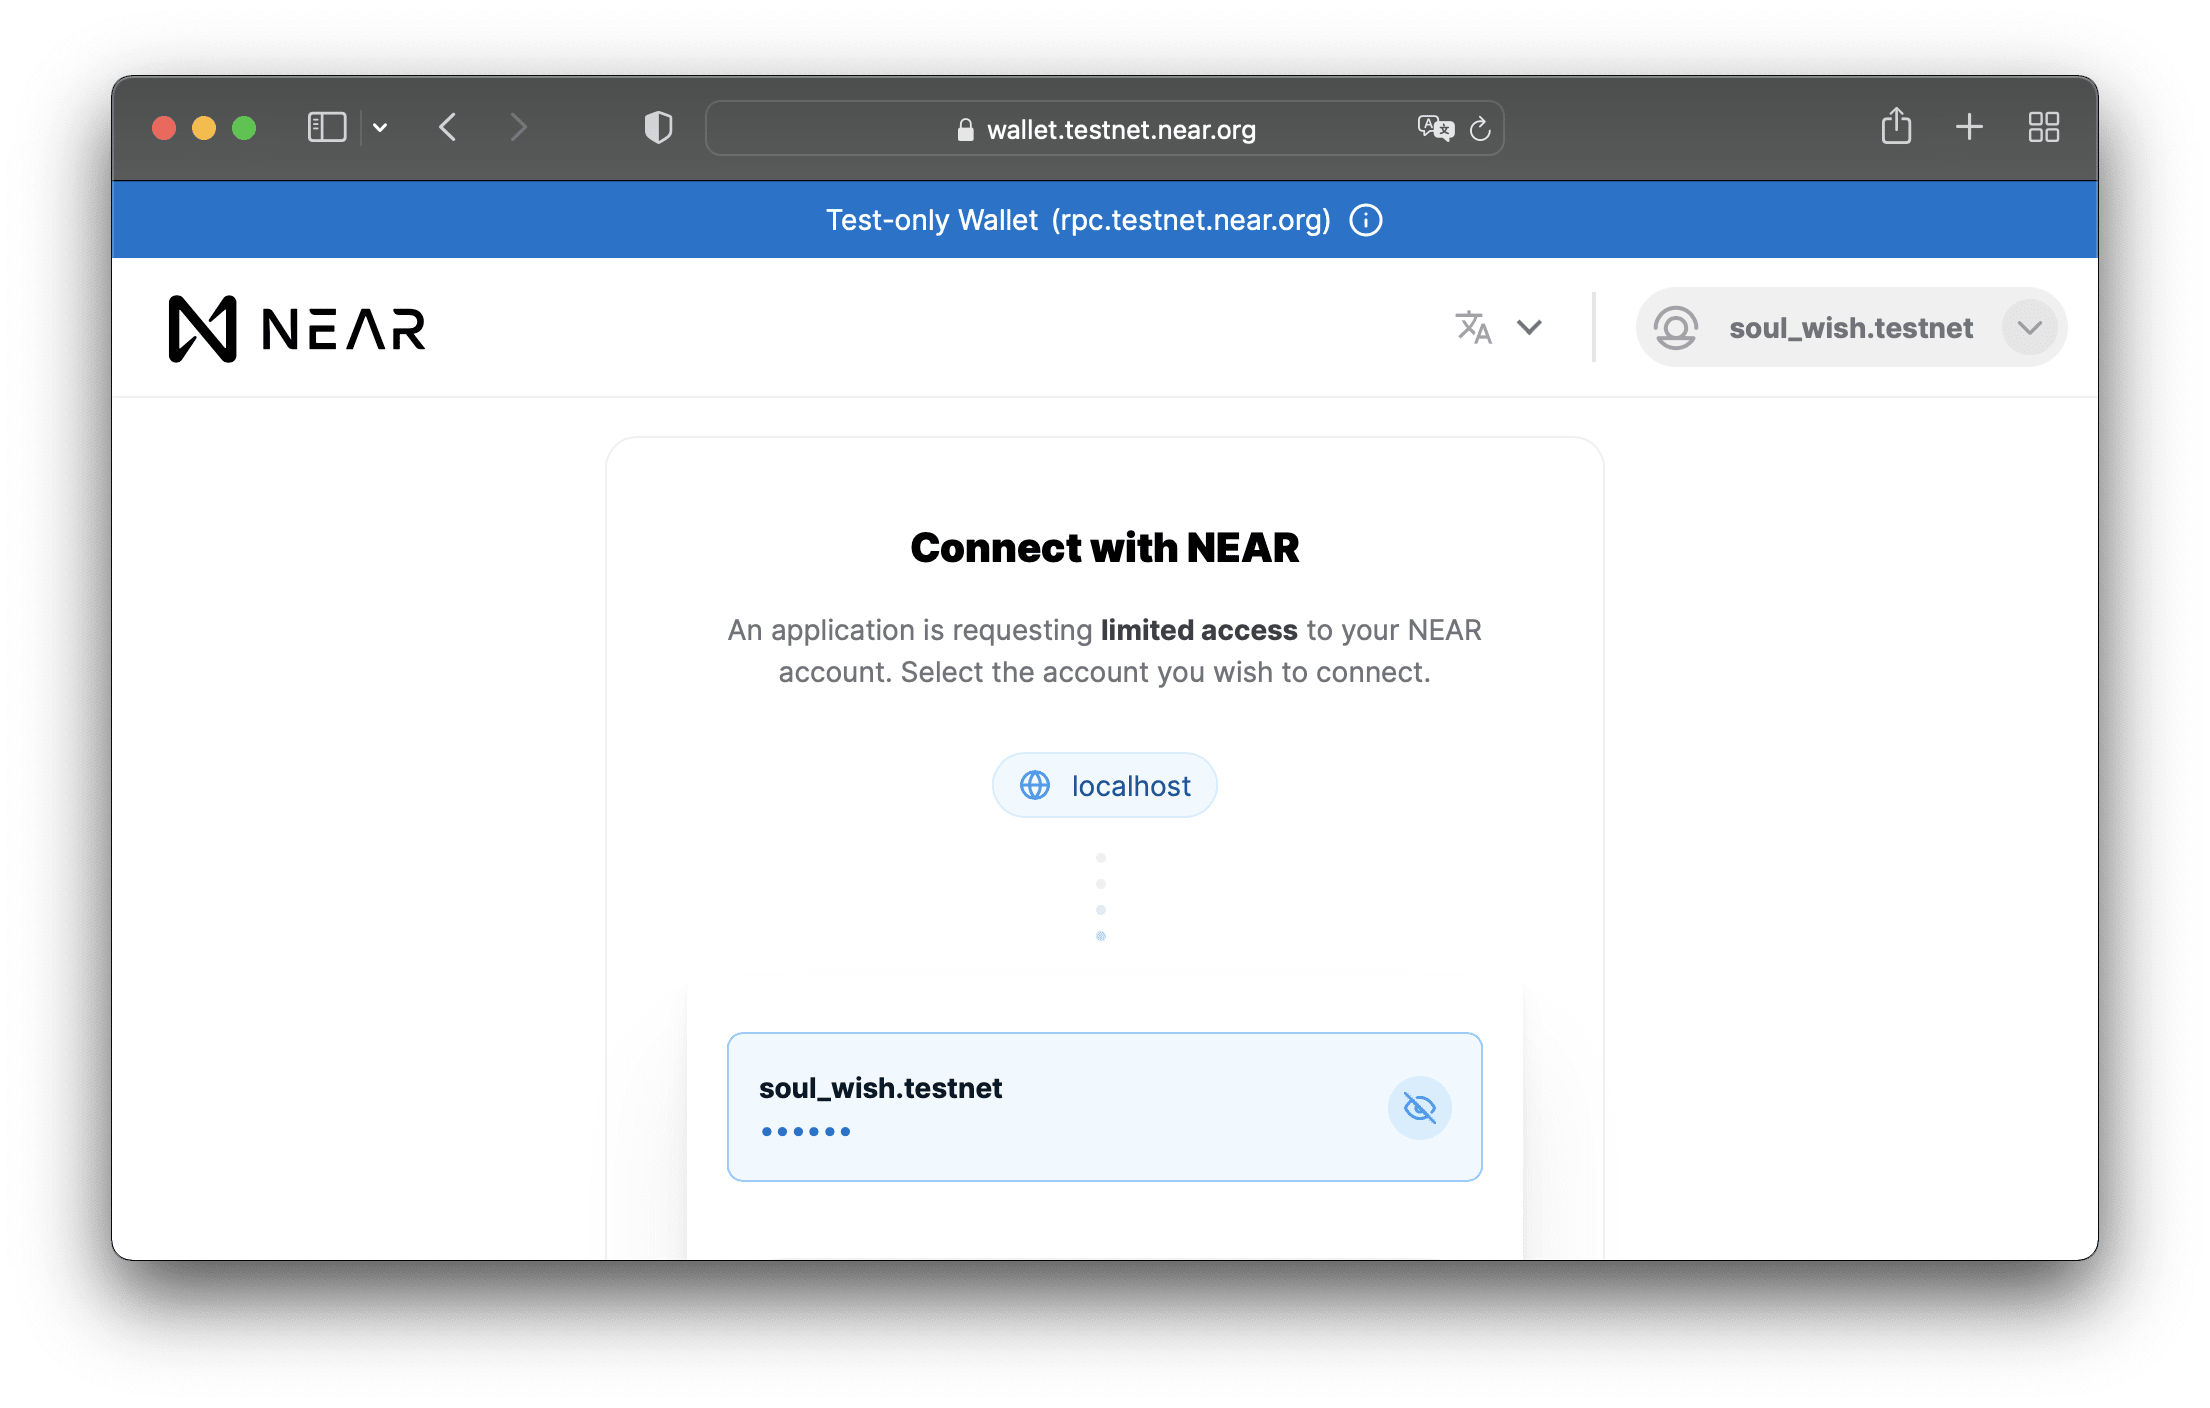
}And now we have the ability to login, logout and display a name of connected wallet right inside of our dApp. Note, that right after connecting to a NEAR network and NEAR wallet we can do anything we want: create new NEAR accounts, transfer some funds, deploy smart-contracts or connect to the existing ones. A simple example of that would be getting a current balance of connected wallet. So, after clicking on “Connect NEAR wallet” button our visitor will be redirected to a NEAR wallet page and asked to provide an access to wallet for our dApp:
After user’s approval he or she will be redirected back to our application:
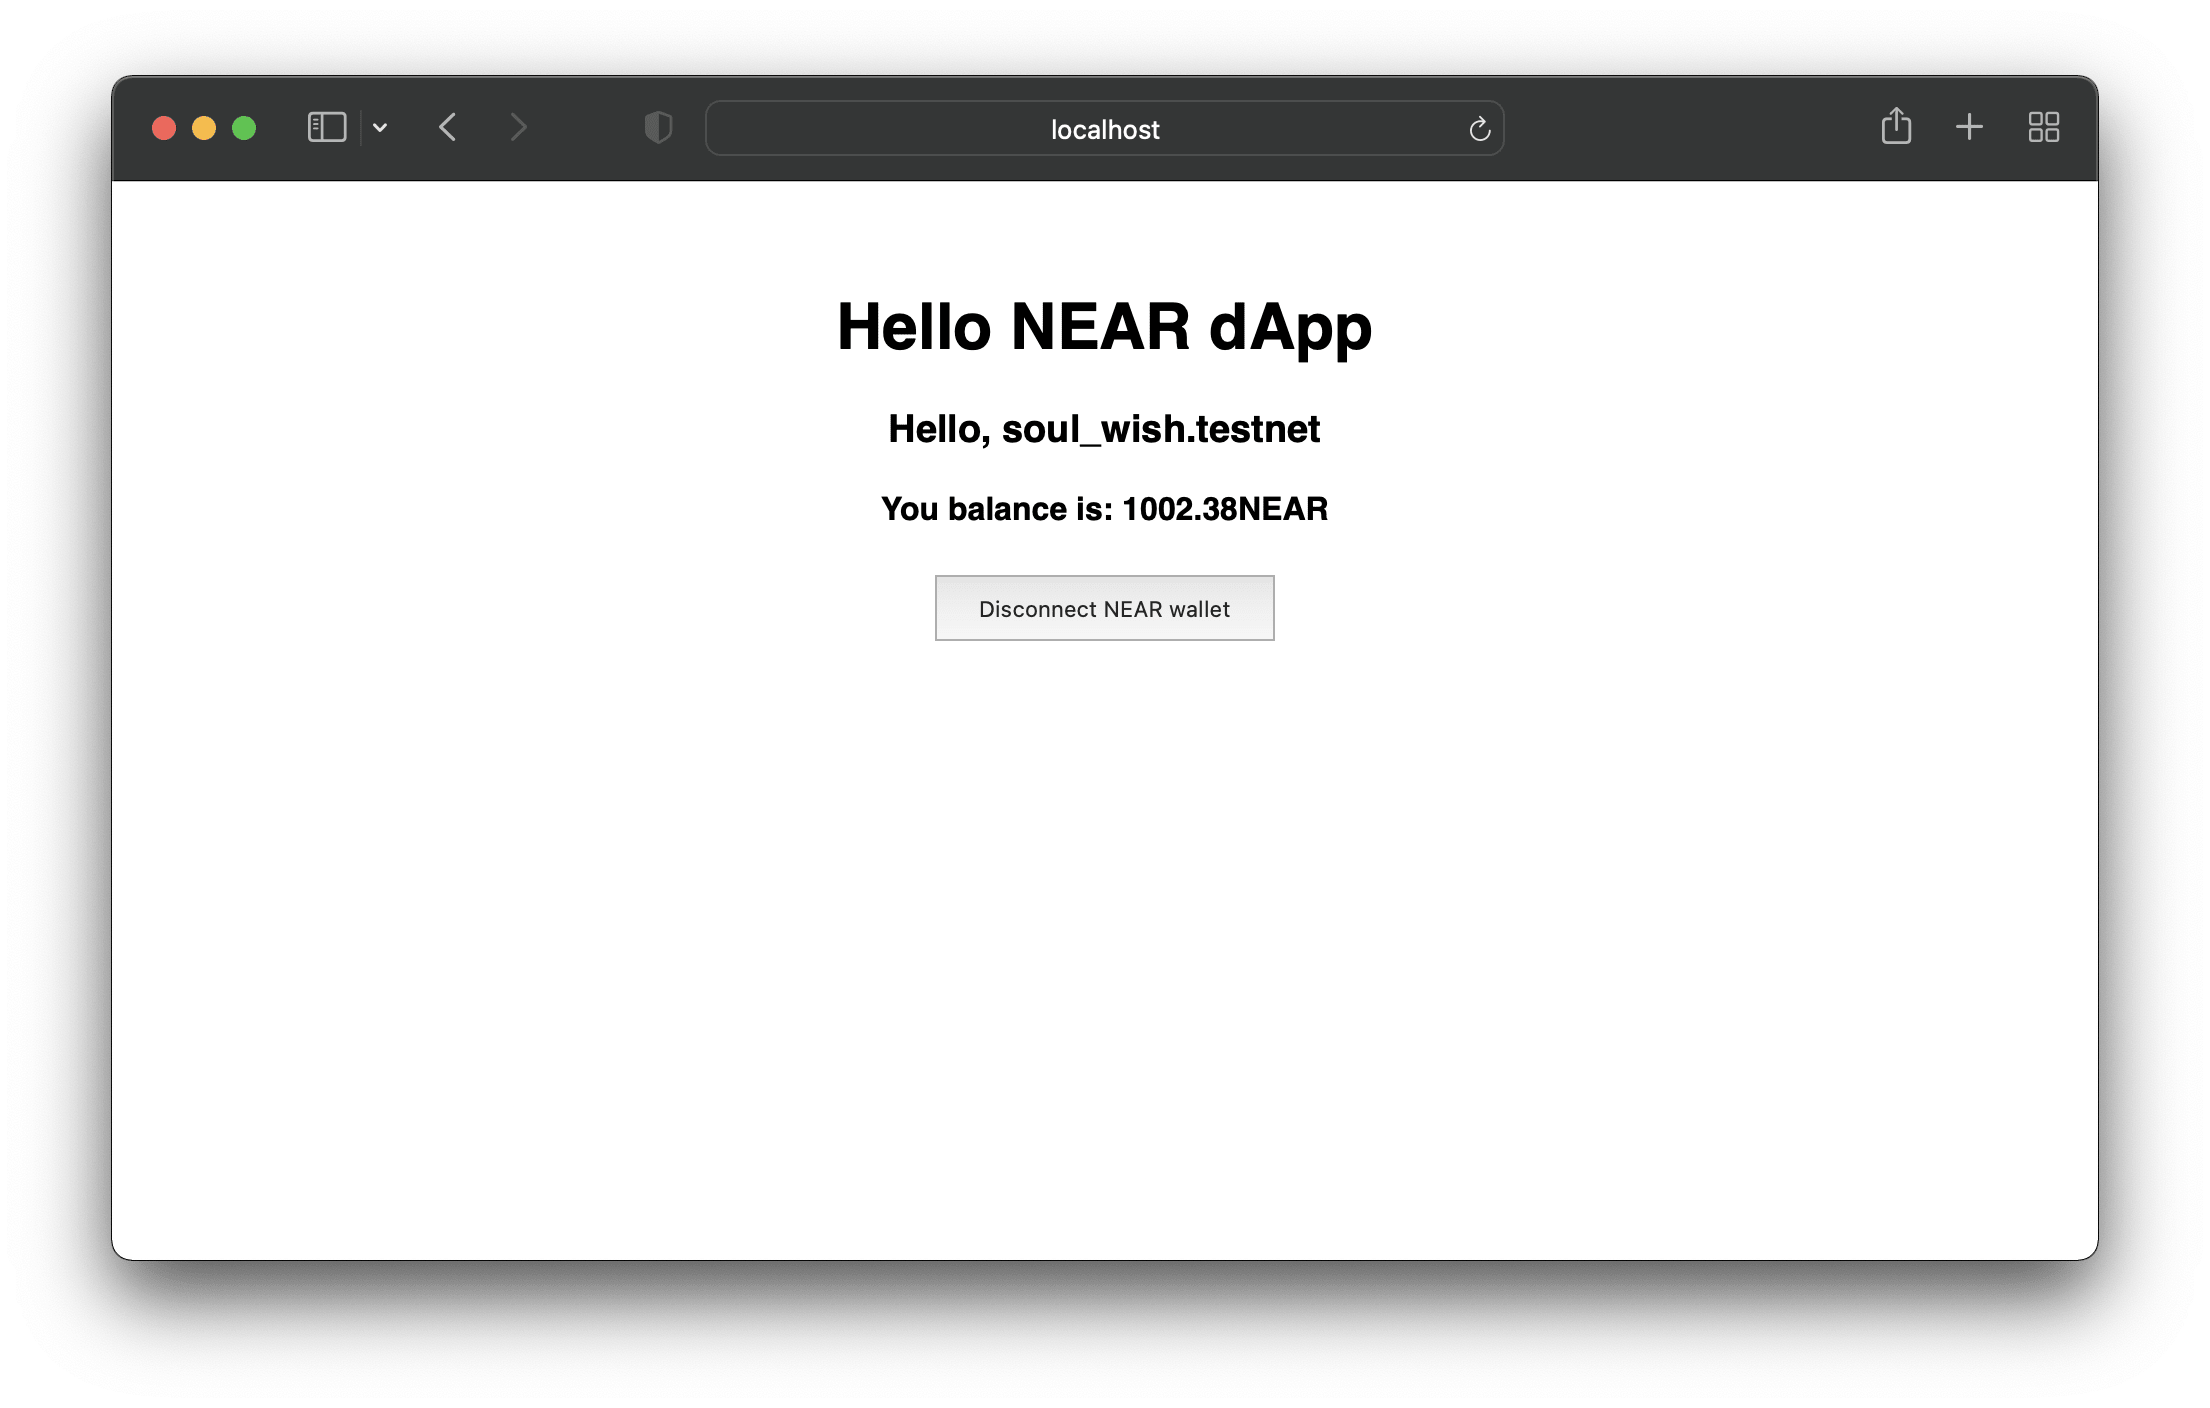
And here is the final version of our dApp component:
<template>
  <div class="container">
    <h1 class="heading">Hello NEAR dApp</h1>
    <div v-if="currentUser">
      <h3>Hello, {{ currentUser }}</h3>
      <h4>You balance is: {{ walletBalance }}NEAR</h4>
      <button type="button" class="btn" @click="logout()">
        Disconnect NEAR wallet
      </button>
    </div>
    <button v-else type="button" class="btn" @click="login()">
      Connect NEAR wallet
    </button>
  </div>
</template>

<script>
import * as nearAPI from 'near-api-js'

export default {
  data() {
    return {
      near: null,
      wallet: null,
      currentUser: null,
      walletBalance: null,
    }
  },
  async mounted() {
    // this will store a wallet access keys in browser's local  storage
    const keyStore = new nearAPI.keyStores.BrowserLocalStorageKeyStore()
    // configuration object
    const config = {
      networkId: 'testnet',
      keyStore,
      nodeUrl: 'https://rpc.testnet.near.org',
      walletUrl: 'https://wallet.testnet.near.org',
      helperUrl: 'https://helper.testnet.near.org',
      explorerUrl: 'https://explorer.testnet.near.org',
    }
    // connect to NEAR
    this.near = await nearAPI.connect(config)
    // create wallet connection
    this.wallet = new nearAPI.WalletConnection(this.near)
    if (this.wallet.isSignedIn()) {
      this.currentUser = this.wallet.getAccountId()
      this.walletBalance = (
        (await this.wallet.account().state()).amount /
        10 ** 24
      ).toFixed(2)
    }
  },
  methods: {
    login() {
      this.wallet.requestSignIn()
    },
    logout() {
      this.wallet.signOut()
      this.currentUser = null
    },
  },
}
</script>
Finally it looks like our decentralized application is ready for production which means it is ready to see Mainnet 🎉
And that’s it for today. I’m thinking about creating a series of short how-to’s tutorials about NEAR blockchain so let me know if you are interested in this type of content. Stay safe and remember: Future is NEAR ;)